Volkswagen Polo Service & Repair Manual: Wire Break with Single Repair Point
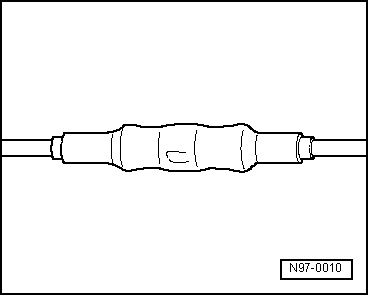
| Repair point with single crimp connection |
| – |
Free up wire intended for repair (approximately 20 cm to
both sides of repair point). |
| – |
If required, remove wiring harness wrapping using a folding
knife. |
|
|
|
| – |
Cut out the damaged section of wire using the Wiring Harness
Repair Set - Wire Strippers -VAS1978/3-. |
 Note Note
| If, by cutting out the damaged wire section, both ends of
the vehicle-specific single wire are too short for a repair
using a single crimp connection, insert a repair wire section of
matching length with two crimp connections. Refer to
→ Chapter „Wire Break with Dual Repair Point“. |
|
|
|
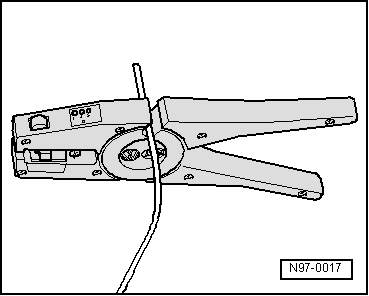
| – |
Strip the wire ends using the 6 - 7 mm wire stripper. |
|
|

|
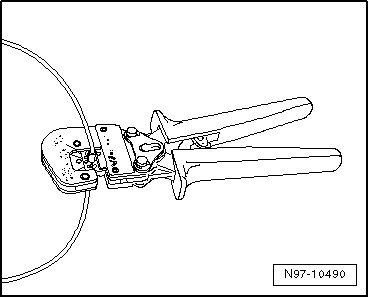
| – |
Slide crimp connection onto both stripped wire ends of
vehicle-specific single wire and crimp them using crimp pliers. |
Note
| Always be sure to use the correct crimping slot for the
crimping connection used. Refer to
→ Chapter „Crimping Pliers with Insert“. |
| Do not crimp wire insulation. |
| After crimping, crimp connections must be heat-shrunk using
hot air gun to prevent moisture penetration. |
| – |
Place the Wiring Harness Repair - Blower - Shrink Element
-VAS1978/15A- on the Wiring Harness Repair Set - Hot Air Blower
-VAS1978/14A-. |
|
|
|
| Make sure that crimp connections do not lie directly next to
each other when several wires need to be repaired. Arrange the
crimp connectors at a slight offset so that the circumference of
the wiring harness does not become too large. |
| In the event the repair point was previous taped, this point
must be taped anew with yellow insulating tape after repairs. |
| Secure the repaired wiring harness if necessary with a cable
tie to prevent flapping noises while driving. |
|
|
|
Special tools and workshop equipment
required
Crimping Pliers - .35-2.5mm -VAS1978/1A-
Wiring Harness Repair - Cri ...
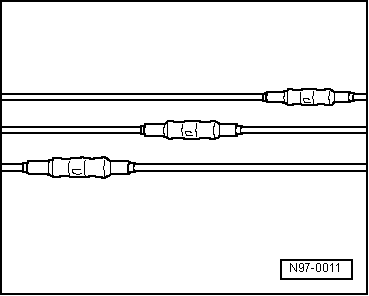
Repair point with intermediate wire section
–
Free up wire intended for repair at two points
(approximately 20 cm to both sides of resp ...
Other materials:
A/C Refrigerant Low Pressure Switch -F73
Note
For switching pressures, removing and installing switches
and switch arrangement and version, see vehicle-specific
refrigerant circuit.
Refer to
→ Rep. Gr.87.
...
Tire Sealant, Expiration Date
Tire sealant in the bottle has a limited storage life.
Therefore, the expiration date is indicated on the bottle
-arrow-.
Replace tire sealant when minimum shelf life date has been
...
Two-Part Clear Coat
Definition:
Two-Part Clear Coat -LLS MAX 210-
Edition 12/2010
Product Description
The Two-Part Clear Coat - LLS MAX 210- is a high-gloss
two-component clear coat for long-las ...
© 2016-2026 Copyright www.vwpolo.net

 Caution
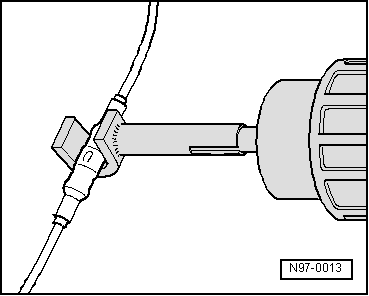
 Wires with Cross Section up to 0.35 mm 2,
Repairing
Wires with Cross Section up to 0.35 mm 2,
Repairing Wire Break with Dual Repair Point