Volkswagen Polo Service & Repair Manual: Wire Break with Dual Repair Point
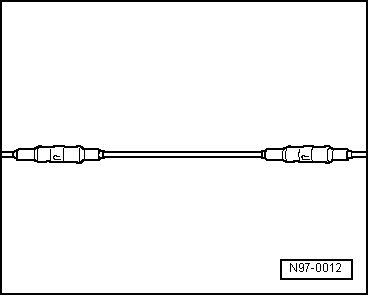
| Repair point with intermediate wire section |
| – |
Free up wire intended for repair at two points
(approximately 20 cm to both sides of respective repair points). |
| – |
If required, remove wiring harness wrapping using a folding
knife. |
|
|
|
| – |
Route the yellow repair wire next to the damaged wiring
harness and cut the repair wire to the required length using the
Wiring Harness Repair Set - Wire Strippers -VAS1978/3-. |
| – |
Cut damaged wire section from the vehicle-specific single
wire. |
|
|
|
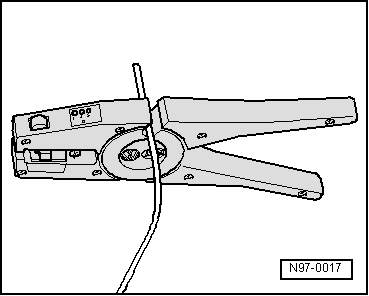
| – |
Strip the wire ends using the 6 - 7 mm wire stripper. |
| – |
Slide crimp connection onto vehicle-specific single wire at
one side and onto repair wire at the other side. |
|
|

|
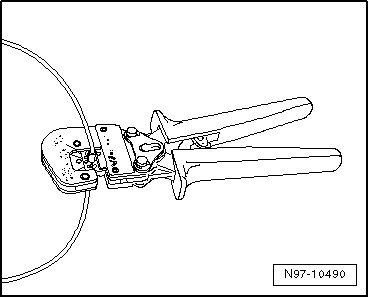
| – |
Crimp the crimp connection at both wire ends using crimp
pliers. |
| – |
Repeat this procedure at the other repair wire end. |
 Note Note
| Always be sure to use the correct crimping slot for the
crimping connection used. Refer to
→ Chapter „Crimping Pliers with Insert“. |
| Do not crimp wire insulation. |
| After crimping, crimp connections must be heat-shrunk using
hot air gun to prevent moisture penetration. |
| – |
Place the Wiring Harness Repair - Blower - Shrink Element
-VAS1978/15A- on the Wiring Harness Repair Set - Hot Air Blower
-VAS1978/14A-. |
|
|
|
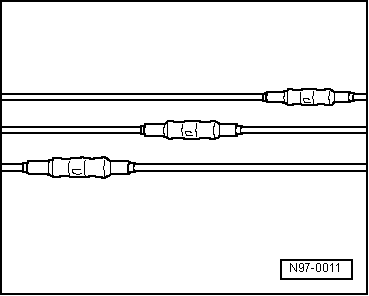
| Make sure that crimp connections do not lie directly next to
each other when several wires need to be repaired. Arrange the
crimp connectors at a slight offset so that the circumference of
the wiring harness does not become too large. |
| In the event the repair point was previous taped, this point
must be taped anew with yellow insulating tape after repairs. |
| Secure the repaired wiring harness if necessary with a cable
tie to prevent flapping noises while driving. |
|
|
|
Repair point with single crimp connection
–
Free up wire intended for repair (approximately 20 cm to
both sides of repair point).
...
Other materials:
Warranty Test, Performing
WARNING
Do not check or charge batteries that have a visual
indicator that is bright yellow. Jump starting must not
be used!
There is a risk of explosion during testing,
cha ...
Introduction
This chapter contains information on the following subjects:
→ Opening or closing the windows electrically
→ Electric windows – functions
→ Roll-back function for the electric windows
Additional information and warnings:
Central locking system
Cleaning and ...
Test Requirements
Note
Check cooling performance. The A/C system is functioning
correctly when the air flowing from the instrument panel vents
has a temperature of 70C or lower.
Setting on Climatronic “LO”.
...
© 2016-2026 Copyright www.vwpolo.net

 Caution
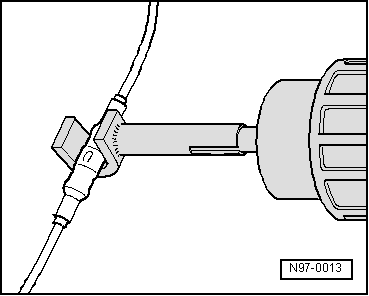
 Wire Break with Single Repair Point