Volkswagen Polo Service & Repair Manual: One-Part Clean Spray Can -LLS MAX 099-, -LLS MAX 100-, Aquaplus System
| One-Part Clean Spray Can -LLS MAX 099-, 250 ml for
Water-Based Mixed Paint “Aquaplus System” |
| One-Part Clean Spray Can -LLS MAX 100-, 400 ml for
Water-Based Mixed Paint “Aquaplus System” |
| These products include a paint spray nozzle prefilled with a
propellant gas- and solvent combination which is particularly
compatible with the “Aquaplus System” and “Aqua Premium System”. |
| Only use the Fill-Clean Filling Device for filling. |
| Application area: exclusively clever repair |
| This product includes a paint spray nozzle prefilled with
propellant gas- and solvent combination which is particularly
compatible with the “Aquaplus System” and “Aqua Premium System”. |
| This can contains no paint material. It is a half-finished
product. |
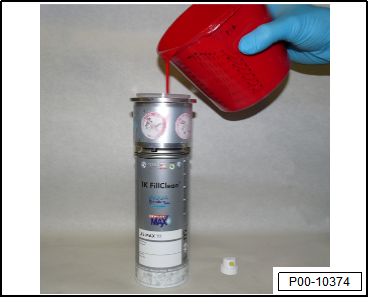
| The processible end product is formed by adding in 100mL of
undiluted Aquaplus or Aqua Premium base paint using the
Fill-Clean Filling Device designed for this purpose. |
| When using ready-made and paint-filled spray cans, re-label
it before using. This can be carried out, for example, by using
a color label that is produced by the mixing bench formula range
and printed out. |
| Make sure that, the information indicated in the following
example is present on the label. |
| The contents of 316 mL (0.32 L) on the label correspond to a
filled spray can. |
| It is pre-filled with 216 mL propellant gas and solvent, as
well as 100 mL of subsequently added Aquaplus or Aqua-Premium
base paint including Additive for Aqua Premium -LVM 035 200- or
Additive for Aqua Premium -LVM 035 301- |
 Note Note
| For work safety, wear appropriate, personal protective
equipment. |
| Set up the device in a well-ventilated room. |
| Do not fill the filling cans above their maximum capacity.
There is a risk of explosion! |
| Never use poisonous, carcinogenic materials or halogenated
hydrocarbons to fill the spray can. |
| Caution: electrostatic charge Only clean the plastic parts
with a moist cloth. |
| All repair work must be performed by a qualified
professional. |
| Paint residue should be removed from the device regularly
with a cloth and appropriate cleaning solution. |
| Routinely check the condition of the compressed air supply
line. |
| Observe the operating instructions for the filling device. |
|
|
|
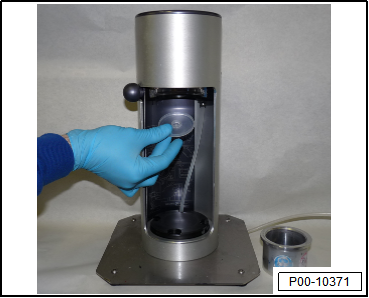
| – |
Set the filling pad on the pressing stamp. |
|
|
|
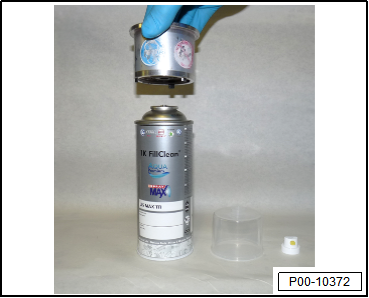
| – |
Set the Fill-Clean Filling cylinder on the spray can. |
|
|
|
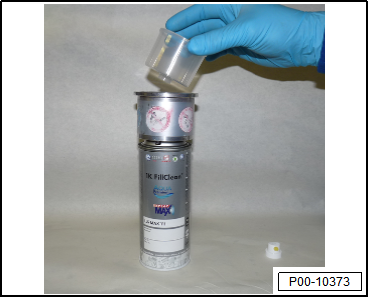
| – |
Position/press the Fill-Clean cap. |
|
|
|
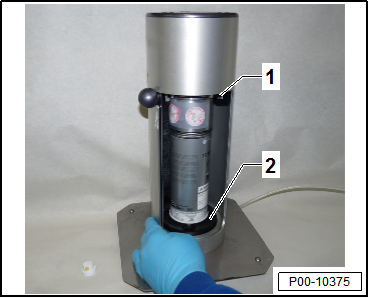
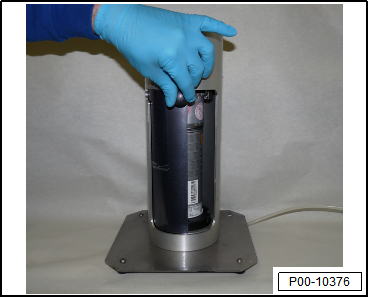
| – |
Insert the Fill Clean can with the loaded filling cylinder
into the upper groove -1- of the
Fill Clean device. |
Note
| When inserting the Fill Clean can into the upper groove
-1-, the lower turntable
-2- must first be at the very
bottom. If the Fill Clean can is in the upper groove
-1-, turn the turntable
-2- as a counterhold upward. |
|
|
|
| – |
Slide the cover with the button to the right to release the
contents. Duration: approximately 10 seconds. |
|
|
|
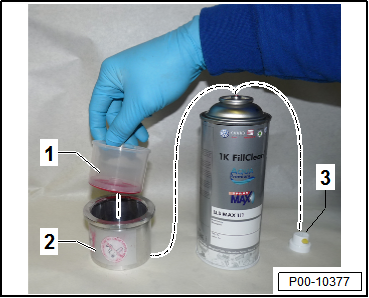
| – |
Remove the filling cylinder -2-
from the Fill-Clean can after filling. |
| – |
Remove the Fill-Clean cap -1-
from the filling cylinder -2-. |
| – |
Position the spray head -3- on
the Fill Clean can. |
|
|
|
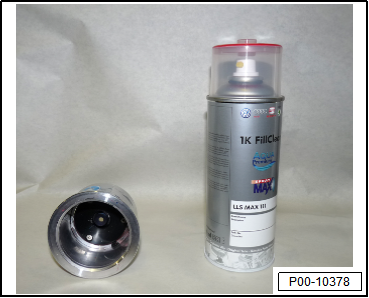
| – |
The pad remains in the Fill Clean cap for color orientation. |
| – |
The Fill Clean can is now ready for use. |
| One-Part Wash Primer -LVM 044 007 A2-/-LVM 044 171 A2- |
| Two-Part Plastic Adhesive Filler -LKF 696 009 A2-/-LKF 696
040 A2- |
| Plastic surfaces. Refer to
→ Note. |
|
|
|
| Pre-treatment of base surfaces: |
| – |
Thoroughly clean the factory- or old paint or two-part HS
filler using Silicone Remover -LSW 019 000 A5-, or beforehand
with Silicone Remover, Long -LVM 020 100 A5- if very dirty. |
|
|
|
| – |
Dry-sand with rotary sander and dust extraction (P 400 to
500 grit). |
|
|
|
| – |
Or wet-sand with P 800-1000 grit sandpaper |
|
|
|
| – |
Before reworking the sanded base surfaces, thoroughly clean
them of dust, sanding residue and other dirt with Silicone
Remover -LSW 019 000 A5- |
| Wipe off any excess silicone remover with a lint-free cloth,
leaving no steaks. Refer to the technical application
information here
→ Chapter „Silicone Remover“. |
| Sanded-through areas must be primed with One-Part Wash
Primer -LVM 044 007 A2-/-LVM 044 171 A2-. |
| The sanded-through areas must not be larger than 5.0 cm. |
| When using the two-part HS filler, any bare areas must be
primed with Two-Part Wash Primer -LHV 043 000 A2- or One-Part
Wash Primer -LVM 044 007 A2-/-LVM 044 171 A2-. |
| It is recommended to create a spray test sample before
processing. |
|
|
|
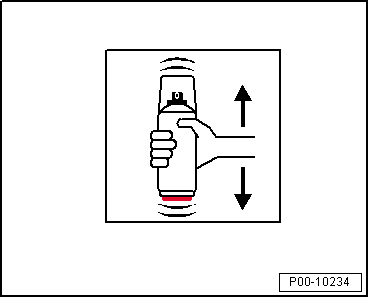
| – |
Shake the can thoroughly for at least two minutes to ensure
a proper mixing. |
|
|
|
| – |
Maintain a distance of 20 to 25 cm. |
| – |
The recommended dry layer thickness is between 15 and 20 µm. |
|
|
|
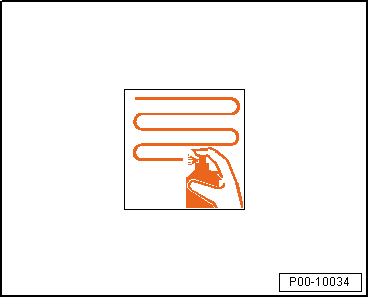
| – |
Apply two spray applications (one normal application + one
finish/effect spray application) with 5 to 10 minutes
intermediate ventilation time. |
Note
| For colors with poor covering properties, it may be
necessary to apply another spray application (wet in wet). |
| Alternatively, it can be ventilated to form a matte finish
in-between spray applications. |
| Make sure after ending or interrupting a spray application
that the valve above the spray head is empty to prevent any
nozzle blockage. |
|
|
|
| Dry at +20 °C (68 °F) room temperature for 15 to 30 minutes.
Important: allow to ventilate until matted. |
| Can be painted over with: |
| Two-part HS clear coat (see data sheet of the respective
product). |
| Two-Part Clear Coat -LLS MAX 210- (reworking with other
two-part HS clear coats is possible) |
 Caution
| For work safety, wear appropriate, personal
protective equipment. |
| Note the safety data sheets as well as the warnings
on the label of the spray nozzle. |
| After filling shake the can for approximately two
minutes. |
| Before applying shake the can for approximately two
minutes. |
| Shake briefly again before every subsequent spray
application. |
| Dispose of the empty spray cans as recyclable
material. |
|
|
|
|
| VOC value: 2004/42/IIB(e)(840)690 |
The EU limit for this product
(product category IIB.b) in ready-to-use form is a maximum of 840 g/L
volatile organic compounds. The VOC-value of this product in
ready-to-use form is a maximum of 690 g/L. |
| The guaranteed shelf life for pre-filled spray cans only is
24 months. |
| The guaranteed shelf life for spray cans filled with paint
is four weeks. |
|
|
|
Definition:
One-Part Wash Primer -LLS MAX 106 M2-, light gray
One-Part Wash Primer -LLS MAX 107 M2-, dark gray
...
One-Part Clean Spray Can -LLS MAX 112-, 400 ml for
Water-Based Mixed Paint “Aqua Premium System”
Edition 05/2014
Product D ...
© 2016-2026 Copyright www.vwpolo.net

 One-Part Wash Primer
 One-Part Clean Spray Can -LLS MAX 112-, Aqua Premium System