Volkswagen Polo Service & Repair Manual: Emergency Wheels
Spare Wheel Notes
| If Necessary, Explain to the Customer the Information About
Tires and Refer the Customer to the Owner's Manual. |
|
|
|
| The following notes listed also apply to spare wheels that
are marked with a yellow sticker with the note “MAX 80 km/h” or
“MAX 50 mph”. |
 Note
| The vehicle may have a spare wheel with the above mentioned
sticker in place of an emergency wheel, depending on the vehicle
equipment. |
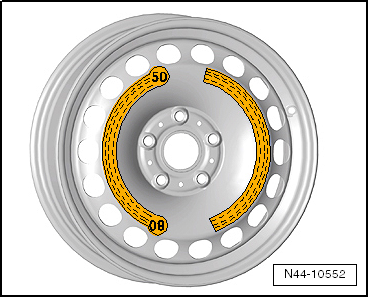
| Emergency wheel/spare wheel is designed only for sporadic
and brief use. Therefore it is to be replaced with the normal
wheel again as soon as possible. |
| After mounting the emergency wheel/spare wheel, tire
inflation pressure must be checked as soon as possible. |
| The tire pressures are listed on the tire pressure label on
the inside of the fuel filler door and on the B-pillar on the
driver side. |
| Always observe the speed rating on the spare tire on the
emergency wheel (“MAX 80 km/h” or “MAX 50 mph”). |
| Wide Open Throttle (WOT) acceleration, strong braking and
rapid driving around curves should be prevented. |
| It is not permissible to use snow chains on the emergency
wheel for technical reasons. |
| If vehicle must be driven with snow chains, therefore the
emergency wheel must be installed on the rear axle for a
breakdown on the front axle. The rear wheel freed up must then
be mounted in place of the faulty front wheel. |
| Refer to the Parts Catalog for replacement part number. |
|
|
|
Snow Chins, Assembly and Replacing
Snow chains may be mounted only on the drive wheels.
If the vehicle has AWD, then snow chains may be used on the
...
Special tools and workshop equipment required
Wheel Bolt Master Socket Set -T10101-
Wheel Bolt Master Socket ...
Other materials:
Introduction
This chapter contains information on the following subjects:
→ Petrol
→ Diesel
→ Autogas
Different engines require different fuels. The factory-fitted sticker on the
inside of the tank flap indicates the fuel type that is required for your particular
ve ...
Wire Break with Single Repair Point
Repair point with single crimp connection
–
Free up wire intended for repair (approximately 20 cm to
both sides of repair point).
–
If required, remove wiring harness wrapping using a folding
...
Fastening and unfastening seat belts
Fig. 50 Inserting the seat belt latch
plate into the buckle
Fig. 51 Removing the latch plate from
the buckle
First read and observe the introductory information
and safety warnings
If worn properly, seat belts hold the vehicle occupants in the correct sitting
position during an accident ...
© 2016-2026 Copyright www.vwpolo.net


 Snow Chains
 Special Tools