Volkswagen Polo Service & Repair Manual: Valve, Removing and Installing, Valve Explanations
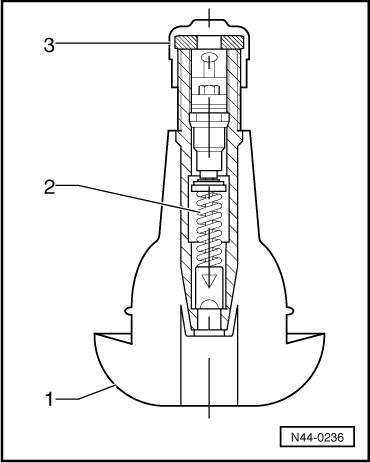
| The rubber valve for tubeless tires is designed to seal
air-tight in the hole in the rim. The elastic material of the
rubber body presses itself tightly into the hole in the rim. |
| When valves with threaded metal feet are used, a rubber seal
is used to seal the rim. The area around the edge of the valve
hole is a sealing area. Therefore, they must be free of rust,
dirt and damage. |
| The valve core has the most important job in the valve. It
creates a seal and enables the regulation of the air pressure.
The small plate seal on the valve core can only do its job when
it is free of impurities, dirt and moisture. The compressed air
system must be free of water and oil! |
| A valve cap must always be screwed onto the valves. It
prevents dirt from getting into the valve. Dirt which may be in
the valve would reach the seal of the valve plate when the tire
is inflated and cause a leak. |
| The valve must be replaced every time a new tire is fitted. |
| If the vehicle is driven without caps on the valves, there
is the danger that dirt may get into the valve. This leads to
gradual loss of air and therefore lead to the destruction of the
tire: |
| Separation of carcass and rubber. Refer to
→ Fig. „“Separation of Carcass and Rubber”“ |
| Wide circumferential furrows in the area of the bead. Refer
to
→ Fig. „“Tires with Wide Furrows Along the Circumference in the
Area of the Bead”“ |
| Disintegrated tread or torn-out tread. Refer to
→ Fig. „“Tires with Torn-Out Tread”“ |
 WARNING
| An air-tight seal is ensured only if the valve cap
is secured tightly. |
|
|
|

|
Make sure wheel rim is clean.
–
Using the Valve Fitting Tool Valve Fitting Tool -VAS6459--1-,
i ...
Other materials:
Centre armrest
Fig. 42 Front centre armrest
First read and observe the introductory information
and safety warnings
To lift, pull the centre armrest up gradually in the direction of the
arrow .
To lower, pull the centre armrest all the way up. Then lower the centre
armrest.
WARNING
The centre armrest ...
Decorative Trims, Replacing, Bonded Decorative Trims
Special tools and workshop equipment
required
Cartridge Gun -VAG1628-
Trim Removal Wedge -3409-
Wiring Harness Repair Set - Hot Air Blower -VAS1978/14A-
Materials ...
Two-Part HS Premium Filler
Definition:
Two-Part HS Premium Filler -LVM 013 171 A4-, dark gray
Two-Part HS Premium Filler -LGF 013 007 A4-, light gray
Two-Part HS Premium Filler -LGF 013 100 A4-, white
...
© 2016-2026 Copyright www.vwpolo.net

 Valve, Removing and Installing, Rubber Valve
 WARNING
