Volkswagen Polo Service & Repair Manual: Adhesive Surface Pretreatment when Replacing Laser-Soldered Roofs
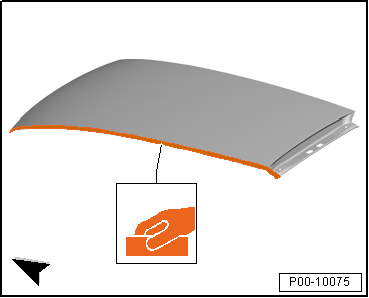
| Dry sand the cataphoretic primer on the roof adhesive surface
-item 6-
→ Item down to the bare metal using P180 sandpaper. |
|
|
|
| – |
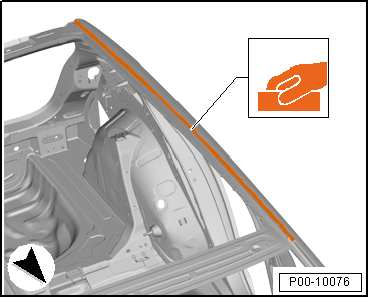
Dry sand the roof pillar adhesive surface
-item 6-
→ Item down to the bare metal using P180 sandpaper. |
 Note Note
| Prime the sanded-through areas outside of the body adhesive
-item 6-
→ Item with Two-Part Wash Primer - LHV 043 000 A2-
and then fill with Two-Part HS Performance Filler. |
| – |
Clean the adhesion area with Silicone Remover. |
| – |
Replace the roof. Refer to
→ Body Exterior; Rep. Gr.51. |
|
|
|
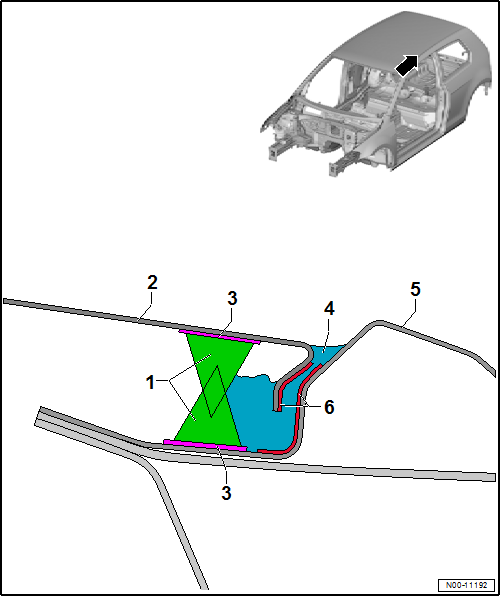
| 1 - |
Two-Part Window Adhesive |
| 4 - |
Two-Part Body Adhesive |
| 5 - |
Roof Pillar/Side Panel |
| 6 - |
Sanded-Down Bare Metal Area |
Note
The underbody and stone chip protection structure must be
restored back to its original layer strength and appearance
during a repair.
...
Note
The corrosion protection in the fender seam must be applied on all
replacement parts, on which the attached seal is not already present.
The additional ...
© 2016-2026 Copyright www.vwpolo.net

 Repair Instructions for the Underbody and Stone Chip Protection
 Fender Corrosion Repair Measures, in Wheel Housing Liner Contact Area