Volkswagen Polo Service & Repair Manual: Wire Break with Single Repair Point
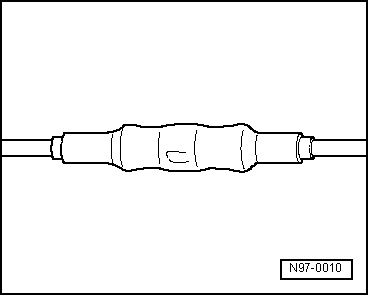
| Repair point with single crimp connection |
| – |
Free up wire intended for repair (approximately 20 cm to
both sides of repair point). |
| – |
If required, remove wiring harness wrapping using a folding
knife. |
|
|
|
| – |
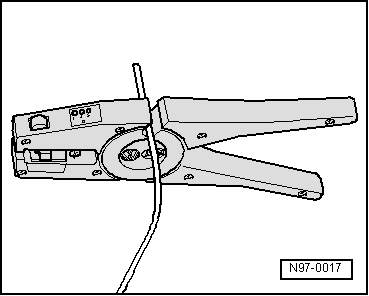
Cut out the damaged section of wire using the Wiring Harness
Repair Set - Wire Strippers -VAS1978/3-. |
 Note Note
| If, by cutting out the damaged wire section, both ends of
the vehicle-specific single wire are too short for a repair
using a single crimp connection, insert a repair wire section of
matching length with two crimp connections. Refer to
→ Chapter „Wire Break with Dual Repair Point“. |
|
|
|
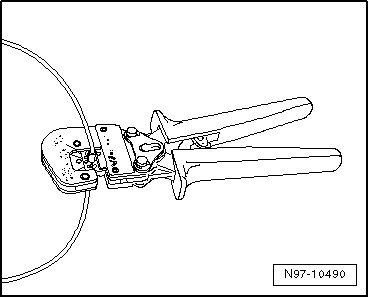
| – |
Strip the wire ends using the 6 - 7 mm wire stripper. |
|
|

|
| – |
Slide crimp connection onto both stripped wire ends of
vehicle-specific single wire and crimp them using crimp pliers. |
Note
| Always be sure to use the correct crimping slot for the
crimping connection used. Refer to
→ Chapter „Crimping Pliers with Insert“. |
| Do not crimp wire insulation. |
| After crimping, crimp connections must be heat-shrunk using
hot air gun to prevent moisture penetration. |
| – |
Place the Wiring Harness Repair - Blower - Shrink Element
-VAS1978/15A- on the Wiring Harness Repair Set - Hot Air Blower
-VAS1978/14A-. |
|
|
|
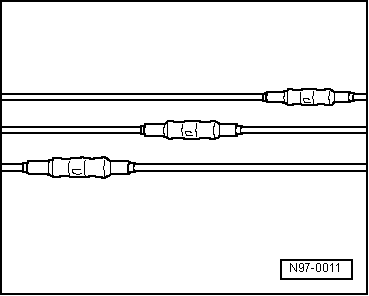
| Make sure that crimp connections do not lie directly next to
each other when several wires need to be repaired. Arrange the
crimp connectors at a slight offset so that the circumference of
the wiring harness does not become too large. |
| In the event the repair point was previous taped, this point
must be taped anew with yellow insulating tape after repairs. |
| Secure the repaired wiring harness if necessary with a cable
tie to prevent flapping noises while driving. |
|
|
|
Special tools and workshop equipment
required
Crimping Pliers - .35-2.5mm -VAS1978/1A-
Wiring Harness Repair - Cri ...
Repair point with intermediate wire section
–
Free up wire intended for repair at two points
(approximately 20 cm to both sides of resp ...
Other materials:
Overview of the menu structure
First read and observe the introductory
information and safety warnings
MFD (multifunction display)
Driving time
Current fuel consumption (Curr. fuel con.)
Average fuel consumption (Av. consumption)
Fuel range
Distance
Average speed
Digital speed display
Digital oil ...
Evacuating and Charging Valve, Low Pressure Side
Special tools and workshop equipment
required
Torque Wrench 1783 - 2-10Nm -VAG1783- with Torque Wrench
1783 - 1/4" Drive Ratchet -VAS6234-
WARNING
There is a dan ...
Winter Tires with Speed Symbol V
Table. Refer to
→ Anchor.
The tire industry delivers winter tires with V-rating also.
These tires can be applied up to the maximum permissible speed vmax
= 240 km/h (149.13 mph) only under certain conditions.
...
© 2016-2026 Copyright www.vwpolo.net

 Caution
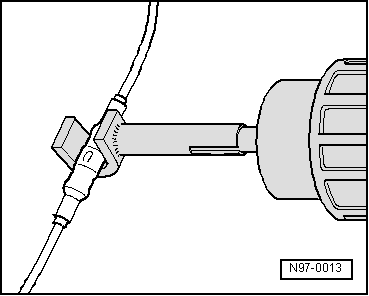
 Wires with Cross Section up to 0.35 mm 2,
Repairing
Wires with Cross Section up to 0.35 mm 2,
Repairing Wire Break with Dual Repair Point