Volkswagen Polo Service & Repair Manual: Threaded Connections, Repairing
| Special tools and workshop equipment
required |
| Torque Wrench 1331 5-50Nm -VAG1331- |
 Note Note
| Do not use rust remover, contact spray or grease because the
lack of friction will cause the torque to be exceeded when
installing and this will lead to the threaded connection
breaking. |
| The gray sanding pads are for slight contamination and
suitable for "soft surfaces". The red sanding pads are for heavy
contamination and suitable for "hard surfaces". |
 WARNING
| Risk of injury. Follow all Warnings and Safety
Precautions. Refer to
→ Chapter „Warnings and Safety Precautions“. |
|
|
|
|
Special tools and workshop equipment
required
Torque Wrench 1331 5-50Nm -VAG1331-
Note
Do not use r ...
Special tools and workshop equipment
required
Torque Wrench 1331 5-50Nm -VAG1331-
The Contact Surface Cleaning Set -VAS6 ...
Other materials:
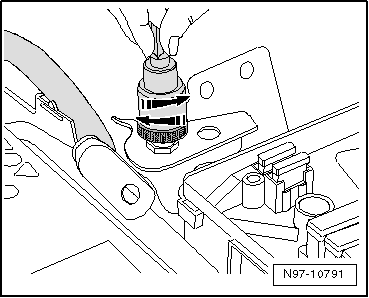
Changing bulbs in the front headlights (halogen H7)
Fig. 180 Rear view of the
right-hand H7 front headlight: dipped beam ①, turn signal ②, and main beam and
side light ③
First read and observe the introductory
information and safety warnings
The actions should only be carried out in the speci ...
Introduction
This chapter contains information on the following subjects:
→ Warning and indicator lamp
→ Pedals
→ Manual gearbox: selecting a gear
→ Automatic gearbox: selecting a gear
→ Changing gear using Tiptronic
→ Driving with an ...
Information on steering
First read and observe the introductory information
and safety warnings The steering should be locked every time
you leave the vehicle to make it more difficult for the vehicle to be stolen.
Mechanical steering column lock
Activating the steering lock
Deactiv ...
© 2016-2026 Copyright www.vwpolo.net

 Caution
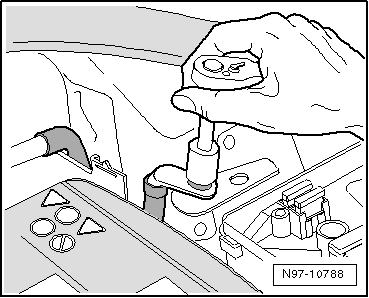
 Wiring Eyelets, Repairing
 Battery Terminal Clamp and Battery Terminal, Cleaning