Volkswagen Polo Service & Repair Manual: 6-Pin Universal Oxygen Sensor, Removing and Installing
 Note Note
| Use the faulty sensor as a guide for installing all of the
accompanying attachments, cable ties or marking bands. |
| Do not crimp or cut the wires otherwise the functionality of
the heated oxygen sensor (HO2S) will be diminished. |
| – |
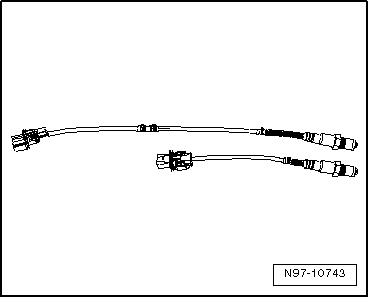
Remove the old heated oxygen sensor (HO2S). |
|
|
|
| – |
Lay both of the oxygen sensor next to each other so the
sensor housings are the same level. |
|
|
|
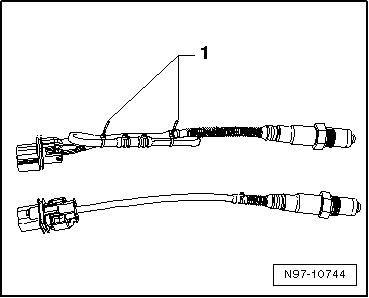
| – |
Tie the excess length of the sensor (approximately 50 to 250
mm) back so it is the same length as the faulty sensor and
secure it with cable ties -1-. |
| – |
Install the new oxygen sensor in the vehicle. |
|
|
|
Note
Do not repair the heated oxygen sensor wires. Repairing may
result in malfunctions.
Use the faulty sensor as a guide ...
Note
In addition to using the part number, the protective pipe
can also be used for identification.
Version D1, 6 openings, 3.5 mm eac ...
Other materials:
Battery, Checking
General Information
WARNING
Risk of injury. Follow all Warnings and Safety
Precautions. Refer to
→ Chapter „Warnings and Safety Precautions“.
...
Foreword
Foreword
(Edition 10.2014)
The content of this guide has been divided into two section.
The first section contains information and important tips
about “towing a trailer”. For example, technical requ ...
Maximum permitted gross combination weight
First read and observe the introductory information
and safety warnings
All data in the official vehicle documents take precedence over these data. All
data in this manual apply to the basic model. The vehicle data sticker in the service
schedule and the official vehicle documents show which ...
© 2016-2026 Copyright www.vwpolo.net

 4-Pin Heated Oxygen Sensor (HO2S), Removing and Installing
 Oxygen Sensor Unit Protective Pipes