Volkswagen Polo Service & Repair Manual: Contacts in Contact Housing, Repairing
| First, open or release if necessary the secondary lock of
the contact housing. Refer to
→ Chapter „Contact Housings, Releasing and Disassembling“. |
|
|
|
| – |
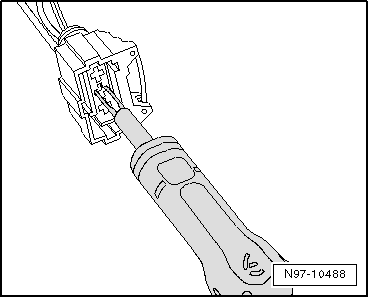
Release contact (primary lock) using the appropriate release
tool. Refer to
→ Chapter „Contact Housings, Releasing and Disassembling“. |
| – |
Pull contact at single wire out of contact housing. |
| – |
Take the yellow repair wire with the correct contact out of
the Wiring Harness Repair Set -VAS1978-. |
| – |
Free up repair point of vehicle-specific wiring harness
(approximately 20 cm to both sides of repair point). |
| – |
If required, remove wiring harness wrapping using a folding
knife. |
|
|
|
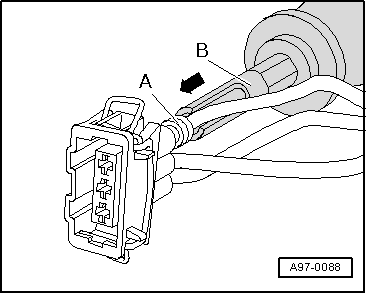
| – |
Insert new contact of repair wire into contact housing until
it engages. |
| – |
Slide a single wire seal onto the repair wire. |
 Note Note
| When doing this, small diameter of single seal must point
toward contact housing. |
| – |
Slide single wire seal into contact housing using the
correct assembly tool. Refer to
→ Chapter „Single Wire Seals, Installing“. |
|
|
|
| – |
Shorten the repair wire and the vehicle-specific wiring
harness single wire as needed using the Wiring Harness Repair
Set - Wire Strippers -VAS1978/3-. |
|
|
|
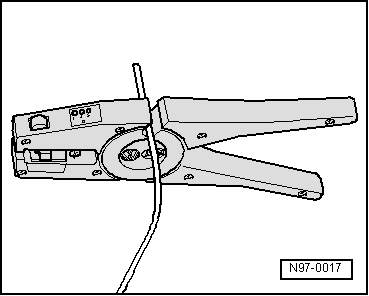
| – |
Strip ends of repair wire and of vehicle-specific single
wire using 6 - 7 mm wire stripper. |
| – |
Crimp the stripped ends of repair wire and single wire of
vehicle-specific wiring harness using crimp pliers and a crimp
connection as described in chapter “Wire break with single
repair point”. Refer to
→ Chapter „Wire Break with Single Repair Point“. |
Note
|
|

|
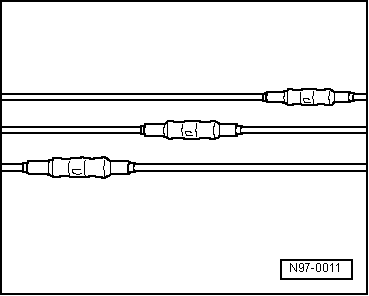
| Make sure that crimp connections do not lie directly next to
each other when several wires need to be repaired. Arrange the
crimp connectors at a slight offset so that the circumference of
the wiring harness does not become too large. |
| In the event the repair point was previous taped, this point
must be taped anew with yellow insulating tape after repairs. |
| Secure the repaired wiring harness if necessary with a cable
tie to prevent flapping noises while driving. |
|
|
|
Note
Observe general notes for repairs on the vehicle electrical
system. Refer to
→ Chapter „Vehicle Electrical System, General Repa ...
Note
Single wire seals prevent the penetration of water and dirt
into the contact housing. They are installed, for example, in
the engine compart ...
Other materials:
Evacuating and Charging Valve with Schrader Valve
Special tools and workshop equipment
required
Torque Wrench 1783 - 2-10Nm -VAG1783- with Torque Wrench
1783 - 1/4" Drive Ratchet -VAS6234-
WARNING
There is a dan ...
Battery Post/Terminal
WARNING
Risk of injury. Follow all Warnings and Safety
Precautions. Refer to
→ Chapter „Warnings and Safety Precautions“.
Caution ...
One-Part Clean Spray Can -LLS MAX 112-, Aqua Premium System
One-Part Clean Spray Can -LLS MAX 112-, 400 ml for
Water-Based Mixed Paint “Aqua Premium System”
Edition 05/2014
Product Description
These products include a paint spray nozzle prefilled with a
...
© 2016-2026 Copyright www.vwpolo.net

 Contact Housings and Connectors, Repair Information
 Single Wire Seals, Installing